1. Confirm you have the latest scope firmware and supported instrumentation
Supported Instruments:
- 5-Series MSO Mixed-Signal Oscilloscope
- 5-Series MSO Low Profile Oscilloscope
- 6-Series MSO Mixed-Signal Oscilloscope
- 6-Series B MSO Mixed-Signal Oscilloscope
- 6-Series MSO Low Profile Oscilloscope
- 4-Series MSO Mixed Signal Oscilloscope
Firmware version must be:
- 1.30.5 (or higher) - To check your firmware version go to Help >> About on the instrument interface.
If you have a supported instrument but need new firmware go to Product Support and Downloads and search for your model number. Filter the results for "software" and download the latest firmware for your scope.
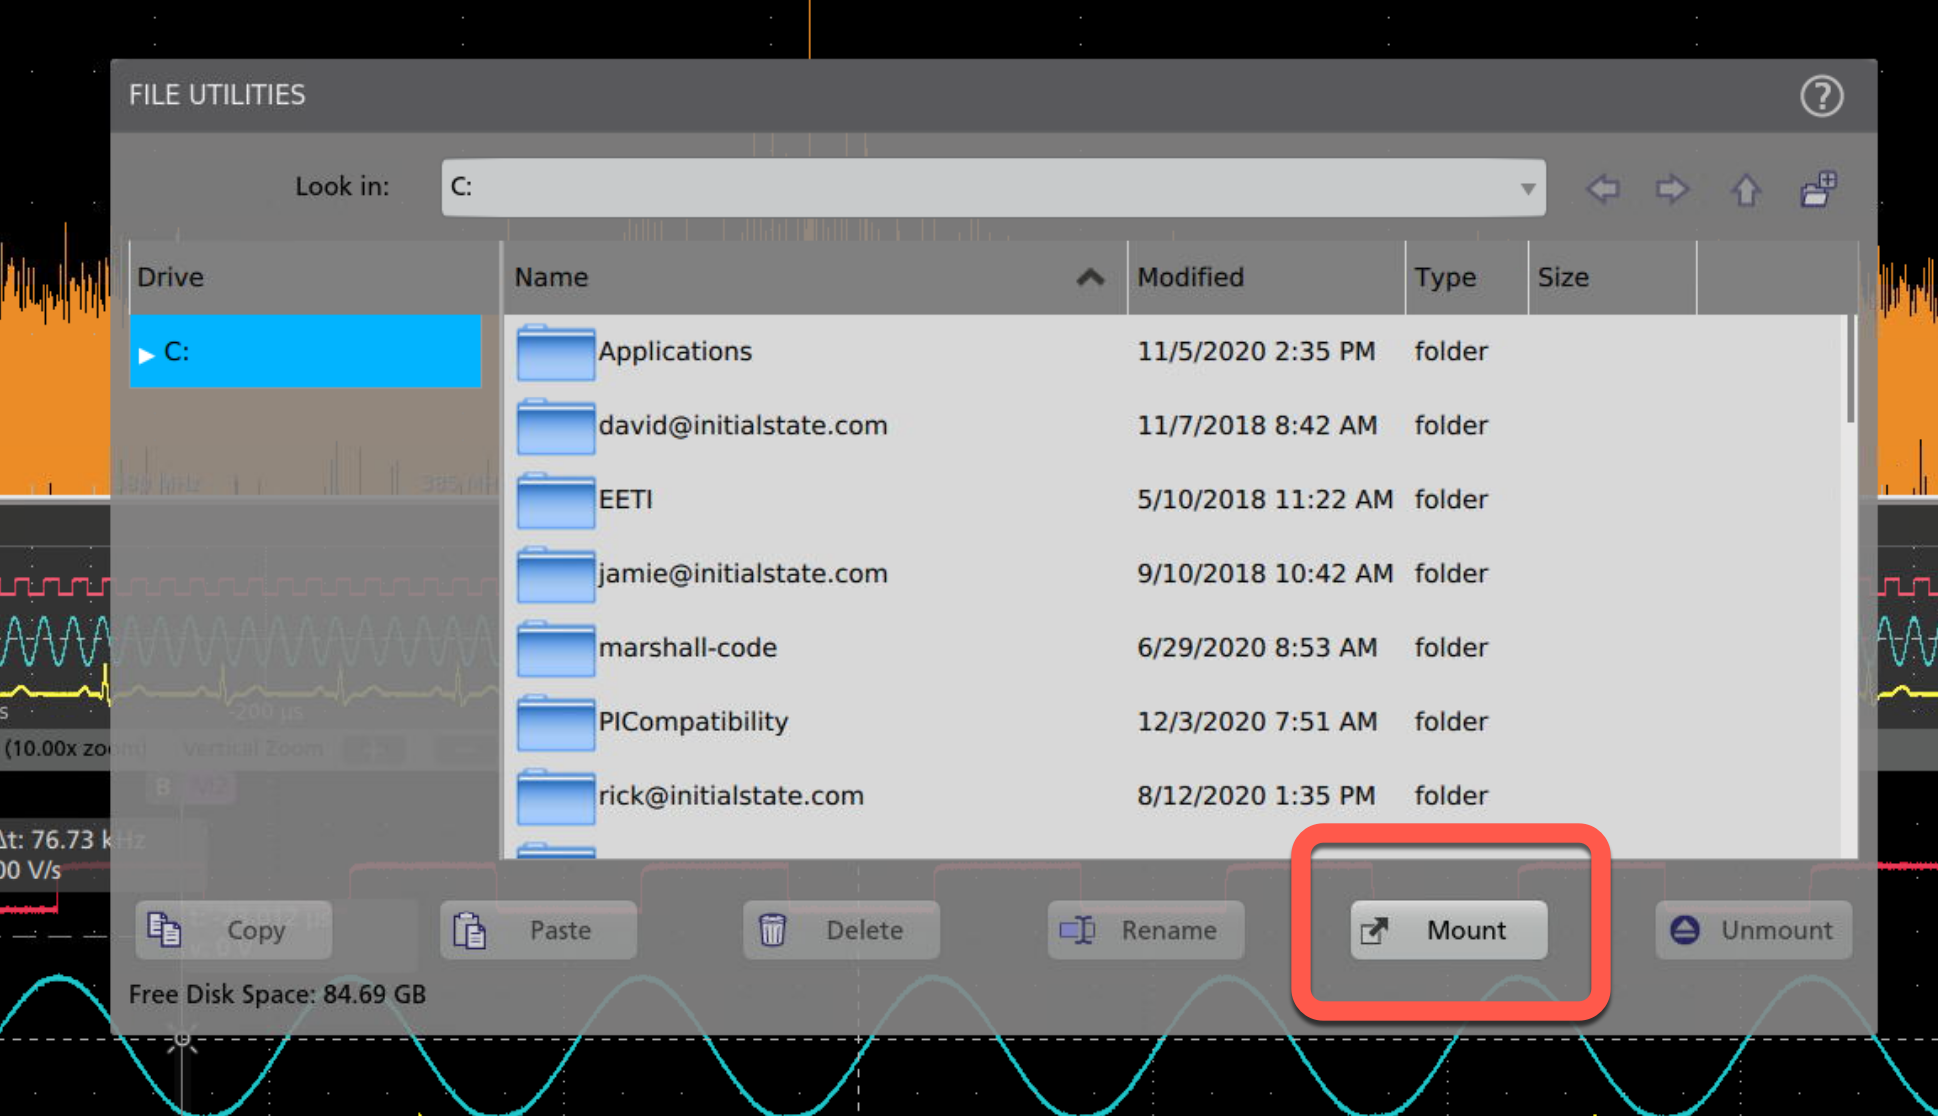
2. On your scope, mount your TekDrive
On your supported scope, go to File >> File Utilities and click "Mount"
3. Configure your TekDrive Connection
Select "TekDrive" in the top tab control to reveal TekDrive configurations. Because scopes are often shared resources, these settings offer users various way to control access to their TekDrive account. Auto disconnect allows you to set rules for TekDrive to automatically disconnect for enhanced security.
- Power Cycle - Disconnects TekDrive next time the scope boots. Turn it off when you are done, and you can be confident the next user will not see your TekDrive data.
- Never - If you want to defer disconnection until you are ready, choose this option.
- Custom - Input a time limit for the connection. Once time expires your TekDrive will no longer be accessible on this scope.
You can also restrict connection to the current IP Address. This means that if your scope ever comes online with a new public IP (not Local IP), the server will reject the connection. We suggest always using the feature unless there is a special network circumstance which requires the restriction to be disabled.
Keep in mind: you can always revoke the connection remotely through the TekDrive web application. Go to your account access keys and "revoke" the connection at any time. 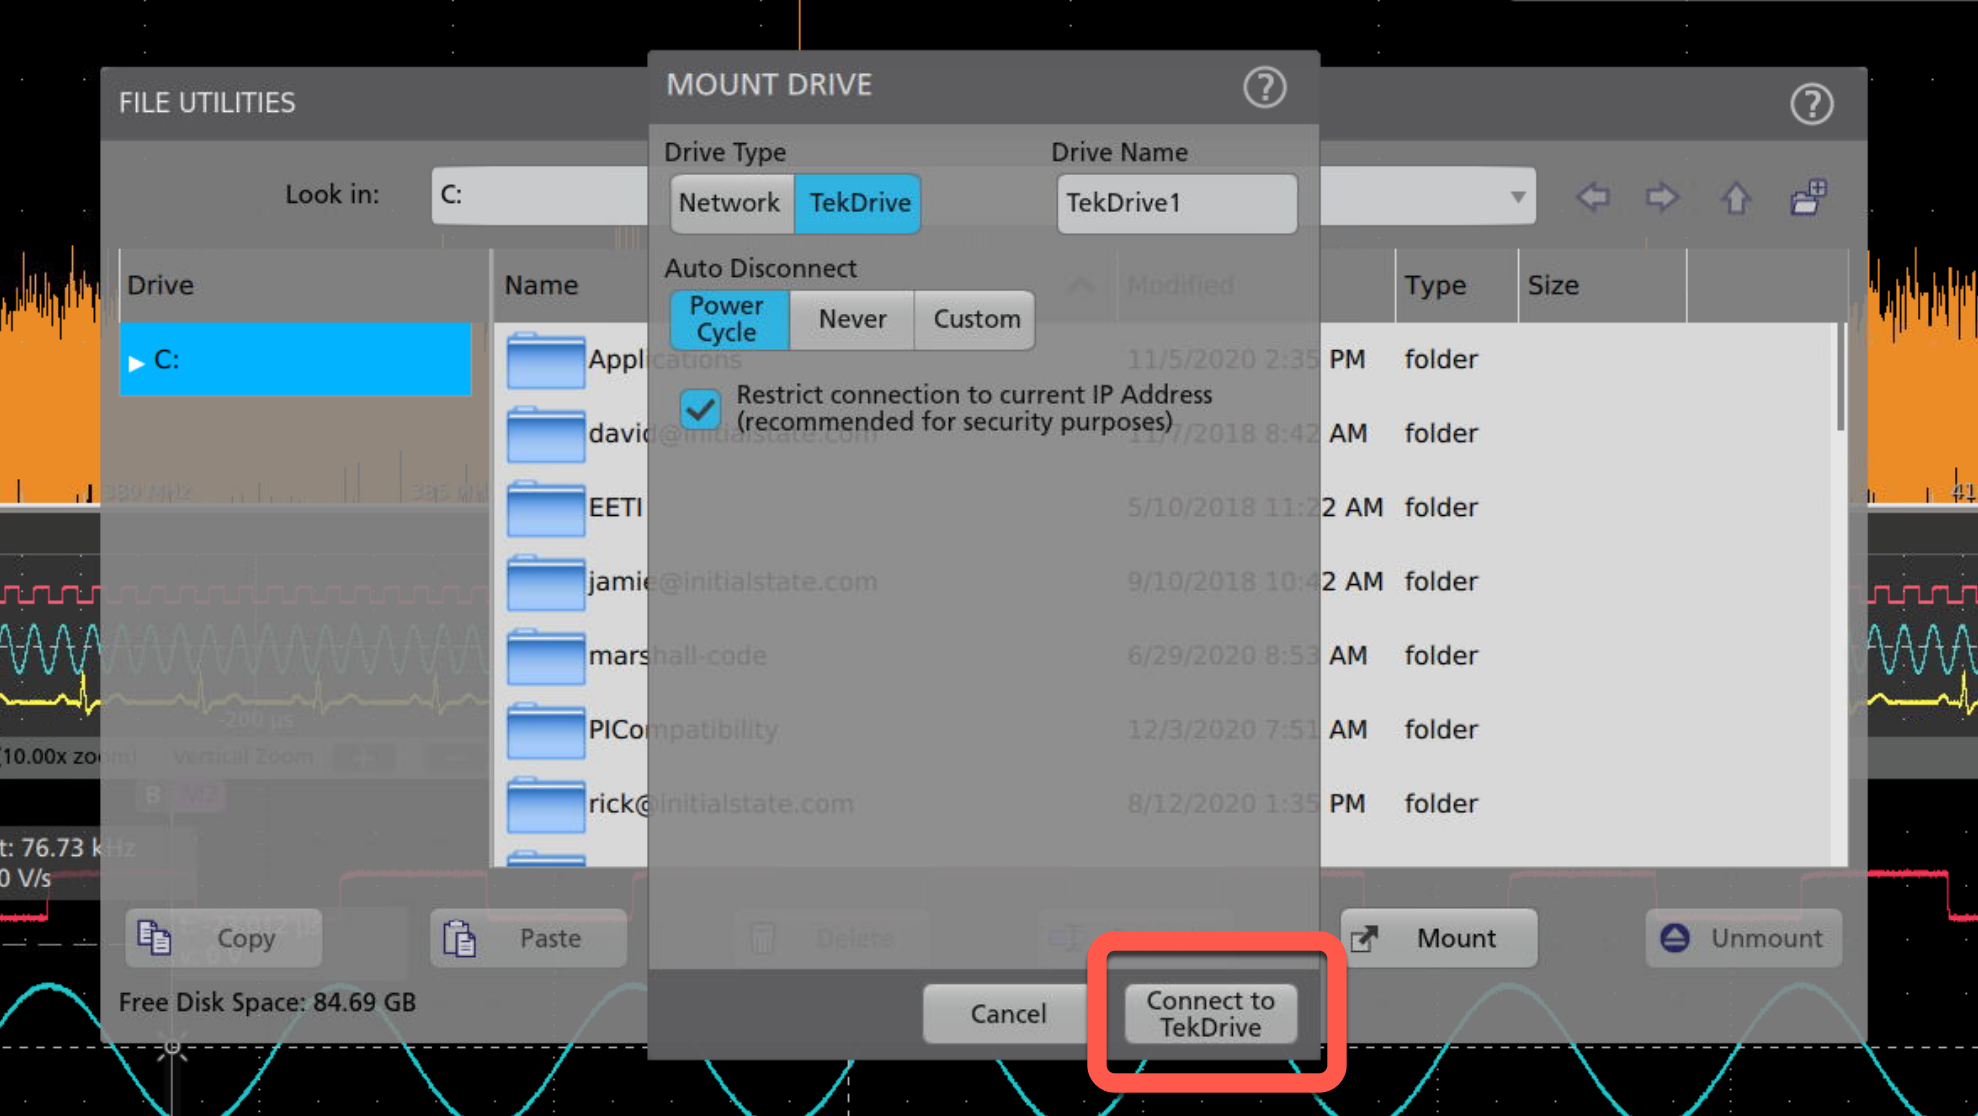
Click "Connect to TekDrive" to continue.
4. Use the "short-code" activation system to complete the TekDrive mount.
The scope will direct you to drive.tekcloud.com/activate. You can also use the QR code to bring it up quickly on your smart phone with the short code pre-filled. Log in to your account (on your device) and enter the code. It is case sensitive so enter it exactly as it appears.
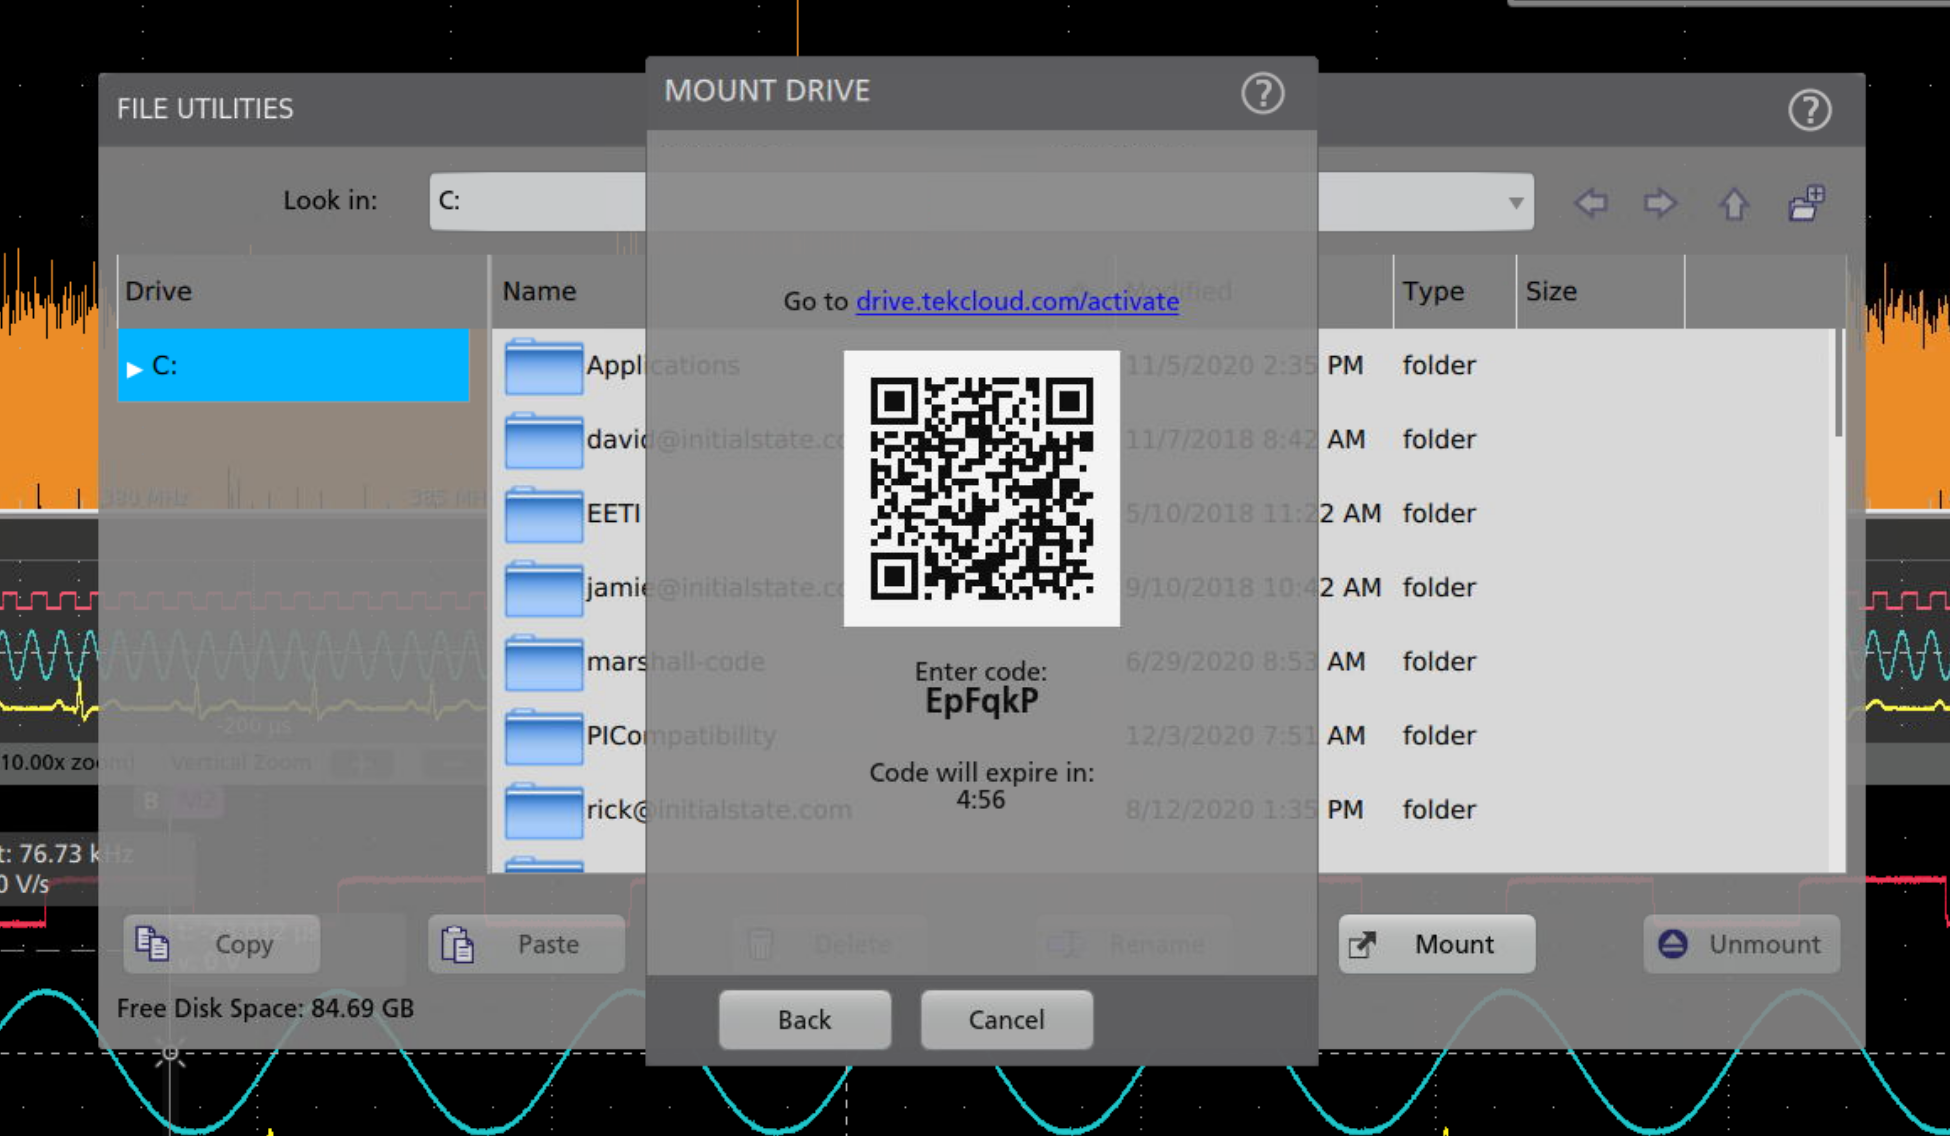
This action will prompt you to complete the activation process. You can verify that you accept the scope's access to your files and confirm the selection. Once you complete the pairing process in a browser, the scope will automatically detect the confirmation and display "Activation Successful".
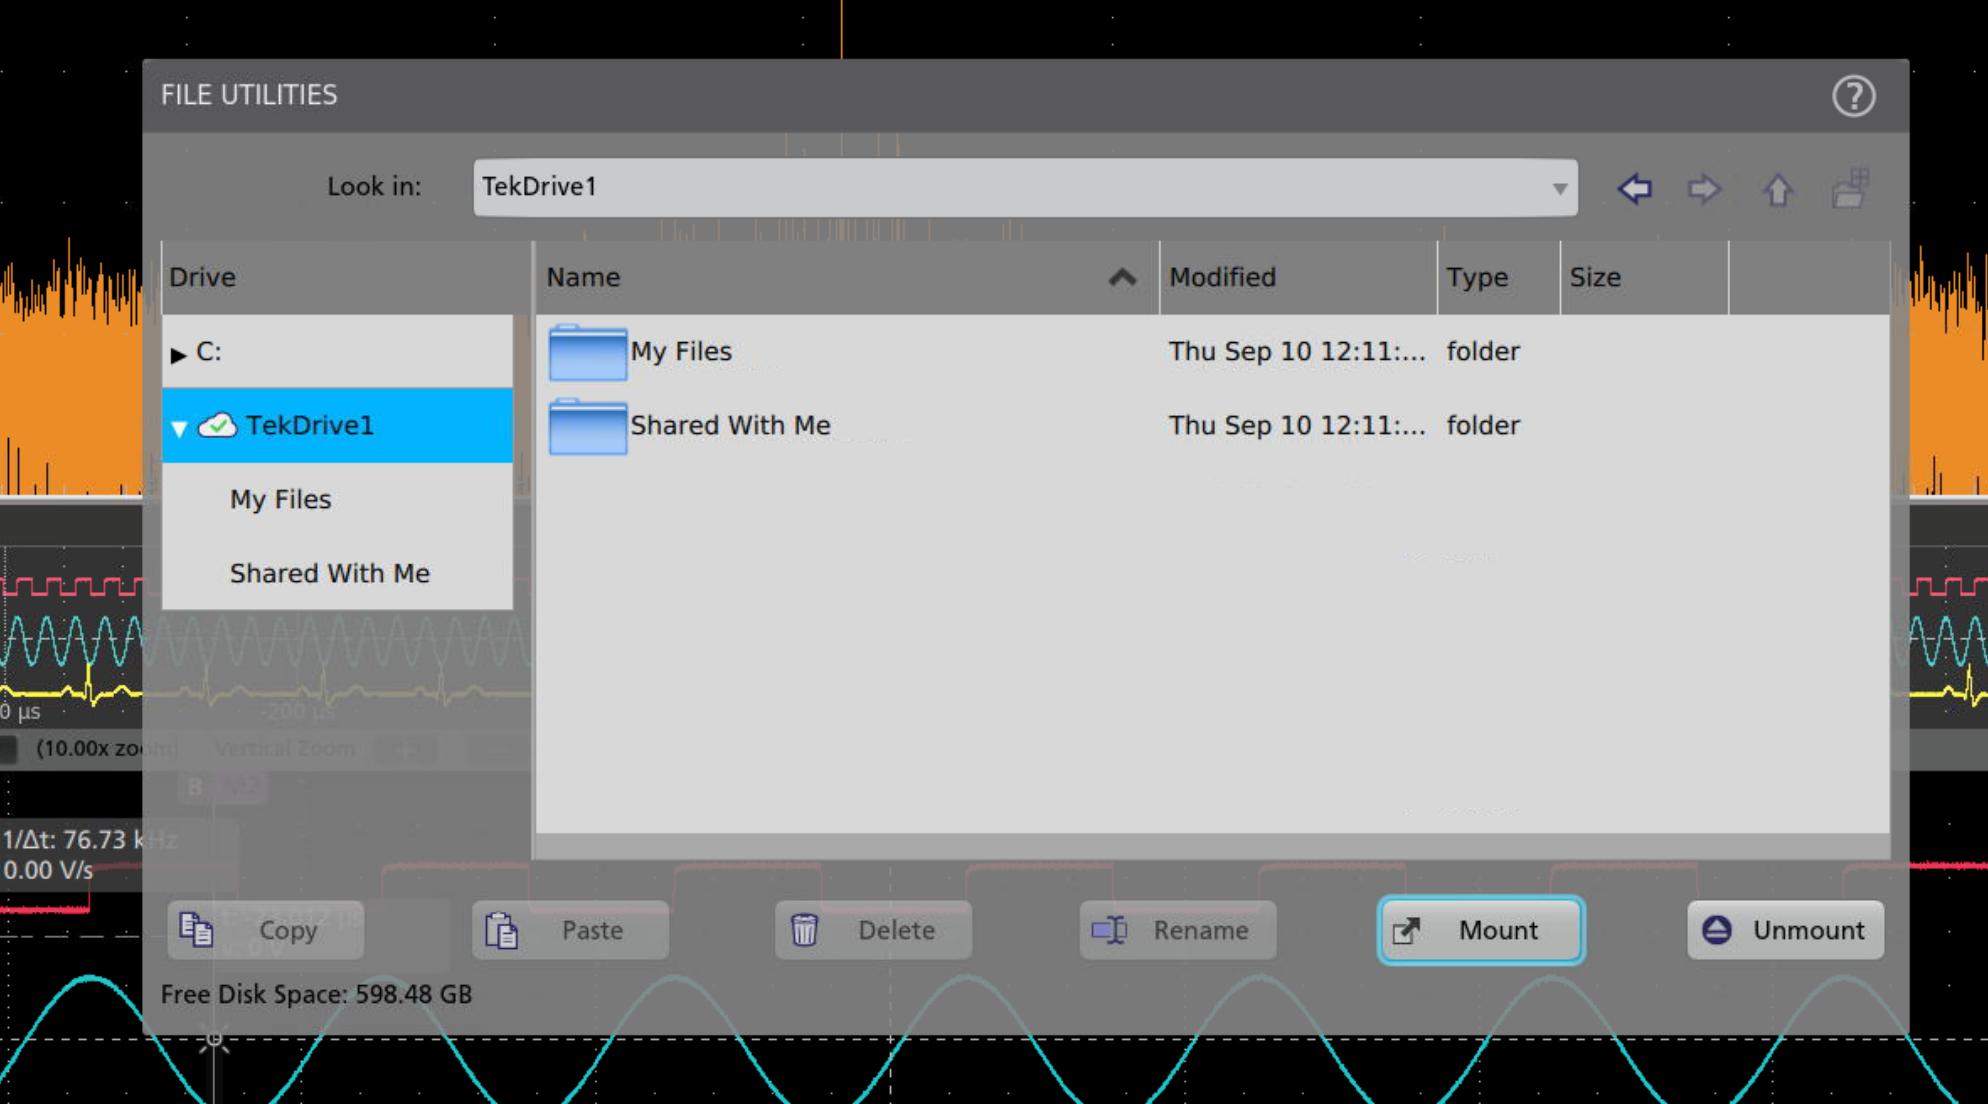
5. Use your TekDrive just like any other drive on your scope
Once you complete the activation, you should see a new drive appear with the name you assigned. Interact with this new drive in save and recall dialogs, and your data will be automatically synched and shared with your team.
Access Keys
Each tier of service (i.e. Individual, Business, or Enterprise) has a limit on the number of active access keys an account can have. Each scope pairing will consume one access key. To reclaim the access key, disconnect the scope or revoke the access key.